Showing posts with label Kid's Themes. Show all posts

Thursday, March 17, 2011

Cupcake Party for 5 Little Girls

 When my friend asked if I might be interested to conduct a cupcake making and decorating class for 5 little girls under the age of 5, I didn't have to think twice to say, "Yes".  How much fun would it be?  HEAPS.... right?  Mmmmm...  it was fun but it was hard work.

I want to break an egg too!
Preparation was simple, I baked some cupcakes in advance so they would have something to start decorating while they waited for the cupcakes 'they made' bake in the oven and cool down.  Prepare the buttercream, I used the American style buttercream which is more durable and slightly less messy, mix the colours, pack the baking tools, ingredients and bring the toppings!  


I show up early to setup and my friend's little girl, Erin who is 3 and her friend is already there waiting and as her Mum says, "They are SUPER EXCITED!"  Okaaaay.  My friend surveys my set up 10 minutes later as I cover her nice dining table with my tools and the small ones for small hands, and tells me I better have lots and lots of pink frosting!  I did have more pink frosting but she wasn't wrong when later I asked the girls what their favourite colours were, the two answers I got were Pink and Strawberry.  I had to make more pink frosting later.  I also gushed and ooohed over purple and yellow to try to get the excited about those other colours as well.


How much candy is on top of that cupcake?!
The girls were great, they helped me stir the butter and sugar, they each got a turn to crack eggs... and smash eggs, they folded in flour and then they got bored.  So we took a 10 minute break while I set up for the decorating part.  I brought different types of sprinkles, 100 thousands, little jelly gems, jelly beans, chocolate balls, rainbow chips and coloured sugar.  Let's just say the decorating part was the 'funnest' part for the kids.  They really piled up their cupcakes as you can see from their photos.  They wanted to eat one cupcake first and after their Mums said OK, they picked at their cupcakes.  5 minutes later, they still hadn't finished eating the candy and toppings they put on top of the frosting!  They must have been on such a sugar rush after.

A very pretty cupcake for you...

Look at the intense concentration - adorable.

Do you have enough Jelly Gems on yours?

All packed and ready to be taken home.  I had a fun time making those labels with my new Uchida Scalloped Egde Round hole puncher.  Someone on Amazon was very happy doing business with me. : )

Tuesday, March 1, 2011

Princess Themed Cupcakes

You've heard it once from me before and you'll hear it again, I love decorating cakes or cupcakes for little girls.  What's not to love about candy floss pinks, tiffany blues, sunshine yellow and so many more shades of pink?

You really don't have to twist my arm to come up with ideas for a girl's party.  So when I was asked if I could make cupcakes for a little girl turning 1... oh YEAH!  A was planning a Princess themed party for her little princess turning 1 and I was more than happy to help.  She liked the marbled effect for the cupcakes like the ones I did for my daughter's cupcake tower when she had her 2nd birthday party.  At first I was a little hesitant as it's easy to make sure the portions are right for a standard sized cupcake but for a mini it is a bit more challenging to get it right.  I have to put 3 portions of batter into that tiny paper liner and we don't want to put too much otherwise the cupcake will swell too high and it'd look odd among it's fellow cupcakers. 

I don't know, I just want the cupcakes to be as uniform in size as possible.  I decided to give it a go in the end and there were some that were slightly overfilled but they weren't too obvious so they got in line just fine.  


 Here they are just swirled and waiting to be baked.

 Fresh out of the oven

  It looks so pretty inside, I just want to eat it!  Actually I did.
 
I topped them with little fondant blossoms cut using the PME Flower Plunger Cutter.  These little babies are a pleasure to use as the spring function allows you to push out the flowers after they are cut instead of using another thin implement to try to push them out and sometimes when you do that, you get odd little marks on the flowers which I hate.


To complete the whole Princess theme, I made a little Tiara with diamente and a little scepter/wand for the birthday girl.  Unfortunately I did not manage to get a picture of both the Tiara or the little scepter/wand but you can see it in the picture below that A kindly sent me.  A rented the cupcake stand from me and arranged the lovely display even though I am sure she must have been quite busy getting the paty ready.

A better picture of what the tiara would look like is below which was made by a friend from my cake decorating class: 

The Tiara is actually extremely delicate as A will attest to.

Here's the birthday girl enjoying her cake.  I couldn't resist, she just looks so adorable!


More cake please?

Wednesday, January 26, 2011

Mei Yang Yang Birthday Cake

 
I really should have posted about this cake before I wrote about Zac's In the Night Garden cake as I made this cake last month for my daughter's 2nd birthday.  I knew for a long while what cake I was going to make for her as it is a character from her favourite cartoon Xi Yang Yang and Hwei Tai Lang (Pleasant Goat and Bad Bad Wolf).  I know, I cringed when I saw the translation into English but that's what the title means.


Mei Yang Yang (Pretty Goat) is a sweet and vain goat. She pretty much plays the role like Smurfette does in The Smurfts.  I was a little scared drawing out her face free hand as it was the first time I was doing it and I didn't want to do a botched job.  I had a print out of her face in front of me as I started. I used little rosettes to make her 'coat' (not sure if fur is the right word here either) so it stood out.  All in all I thought it was a good likeness and the fact that my OH was impressed said a lot.  

I baked a strawberry and berry cake for her with home made strawberry jam in between the layers.  Strawberries are finally in season again in Korea.


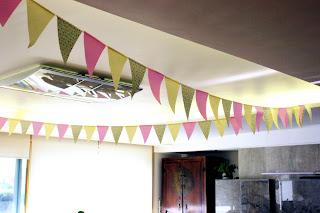
I got the inspiration to string up her name like on a laundry line when I was looking at wedding ideas with my brother's girlfriend.  I saw some fabulous cakes and saw this fabulous idea!  I had some leftover wrapping paper which I used to make flag buntings to decorate the house for the party and I cut out her name, glued it onto the string with hot glue and tied it to two Pepero sticks then stuck it into the cake.  I have kept her name to be hung up, somewhere... when I get around to it.  It's for keeps.


My friend Liz came over and helped me make these flag buntings.  We had a nice chat over 2 hours and did quite a lot of these.  Total cost is probably under KRW10,000.


Just to make my life more difficult, I made cupcakes.  I felt that a party for the kids without cupcakes wouldn't be a Gerry party.  People have come to expect cupcakes when they come over.  Such has become the association that I have created.  Gerry = Cupcakes.  I love it! 


So I made these Pink, Purple and Yellow Marbled Rose Cupcakes Frosted with Vanilla Buttercream, Sprinkled with Pink Sugar and then topped with.... wait for it, Cookie Pops.  Yes, Cookie Pops covered with Royal Icing.  First of all, I loved the colours but they took AGES to make as I had to let the cookies dry overnight after I outlined and flooded them with royal icing.  But the effect was worth it as a cupcake tower.

Here they are ready to go into the oven.

Fresh out of the oven, nicely swirled.
 
Ok, so I couldn't resist one.

You can just see the birthday girl in the background there.

Happy Birthday Baby!


Sunday, January 16, 2011

In the Night Garden Birthday Cake


My son is a fan of In the Night Garden, the British TV programme aimed at toddlers and pre-schoolers.  His sister watches it occassionally but it was when she got the Makka Pakka plush toy that sings and talks that he really started taking an interest.  So it was a bit of a no-brainer when it came the time for me to think about what kind of a cake to make for him for his 1st birthday a week ago.

I saw some cakes online where they created the characters out of gum paste.  They look like the real thing but I was going for an "OMIGOD!  That's Igglepiggle."  Perhaps I was in doubt of my abilities to get Upsy Daisy's face colour right or contemplating how I would get Iggle Piggle's blanket to fall just so.  It could also be the stark reality that I would have no time to complete the characters as they would need at least 24-48 hours to properly dry out and I only had 4 days to make and bake (at the same time complete 2 orders the day before the party) and prepare for the party.  So I thought, "Nah!". 

That's why when I was in Sydney in October, I bought the figurines from Toys R Us.  Easy.  So now it was left to me to create the scenery.  I had to make the gazebo first.  I was about to go to Australia for 2 weeks and when I got back I had only days to fulfill my cake orders, bake and decorate Zac's cake and prepare for the party.  I had no time to make the Magic Gazebo which will take days to dry out.

Iggle Piggle and Makka Pakka wave Bye Bye.

I thought about how to make the top of the gazebo as it would be challenging.  I considered using fondant and make it into gumpaste but it seemed like a waste of good fondant.  No one was going to eat it and I wanted it as a keepsake (we'll see how long that will last after a couple of home moves) too.  I got the idea to use Rice Krispies made into treats from watching Cake Boss.  Buddy goes on about how he uses rice krispies/cereal to mould the larger and more complicated figures.  

A good friend of mine, gave me a box of rice krispies not long ago and told me that you just melted marshmallows to mix with the rice krispies and that's how you get rice krispy treats.  The box also had the instructions on the side.  Bing!
I just love the colour combination on Upsy Daisy.
Melting the marshmallows was... interesting.  I wasn't sure what exactly it was supposed to look like cos it was mostly soft and stuck to the bottom of the pan.  It didn't get liquidy or gooey just smeared in a soft form.  I chucked the rice krispies in just when I thought I was about to burn the marshmallows if I left it in there any longer stirring or not.  It came together in the end.  It was pretty hot to handle as I was molding it but I wanted to shape it before it got too cool and hardened.

Tomliboo Oo, Tomliboo Un and Tomliboo Ee out having some fun!
I scraped the rest of the leftovers out from the bottom of the pan and my husband was quite happy to munch on that.  I had to soak the pan overnight to get all the marshmallows out.  After I shaped the top of the gazebo, I stuck a toothpick into the top to add the round white ball that adorns the top.  Then I cut the pieces of blue and yellow fondant that covers the gazebo.  To hold up the top of the gazebo, I wrapped long toothpicks with blue fondant which I left out to dry but not before marking on both the base and the top where they would fit in.  This was important as the top of the gazebo would be extremely hard to pierce after the rice krispies hardened.

The base of the magic gazebo was just made from gum paste as it was quite thin.  I was really happy with the results as the dimensions were about right for the cake and Iggle Piggle who shared the top tier of the cake with Makka Pakka.


I also added some daisies and blossoms which are in the show as well as the little balls of flowers that dot around the landscape in the garden.  These were gum paste balls covered with Tylo (edible glue made from water + CMC powder) then rolled in coloured sugar.  Here's what it looks like in the show:


This is a close up of the flowers balls I made with coloured sugar:


The cake had serious chocolate flavour. I first tasted it a year ago from my friend W who made a delicious birthday cake for her daughter.  She gave me the recipe which she got from Allrecipes.com.  I made it for my Dad in May and after the first mouthful he said, "This is too much chocolate!" and guess what the name of the cake is: Too Much Chocolate Cake!  Hee hee hee.  Oh but it's soooo good though.  Think of a Devil's Food cake plus chocolate pudding (Jell-O) and chocolate chips.  Deep, dark and intense.  The kids were on a sugar rush for hours after!  Here's the recipe.  I added Chocolate Cream Cheese frosting between the layers to add that little bit of tartness to cut through the heaviness of the chocolate.  A match made in heaven.

Friday, January 14, 2011

How to Make a Pirate Ship Cake (Guest Post by Stephanie)

I went to a specialty baking store in Malaysia with my sister many months ago and found some really cute pirate candles and immediately thought of using them for my boyfriend’s birthday – he has this thing about pirates...Arrrrrr!  I have been holding out since then and waiting till December for his birthday to put them to good use.  My idea was to bake a pirate ship cake so I could stick those cute little pirates on top of it.  I Googled for some ideas, and found this which pretty much fit the bill for me.  Of course I had to simplify it a little more as I did not have as much time to play around with things like fondant, and also because baking goods are hard to find in Melbourne and are very very pricey as well.  After putting some thought into it, I decided what my pirate ship would look like.  I pretty much had to improvise an alternative way to create the railing around the ship’s deck.

At this point I was pretty excited about baking my first 3D cake.  I must admit that this was by far the most complicated cake I have ever attempted, and that there hasn’t been many at all.  Now, I only had a few hours to complete the whole thing so I decided to cheat and use cake mix from a box which would save me some time.  He had mentioned a craving for marble cake the day before, so I used one box of Devil’s Food Cake mix, and one box of Vanilla Cake mix – both by Betty Crocker.  

I prepared both the cake batters, and used a mixing spoon to put alternate spoons of the chocolate and vanilla batters into a 20cm x 5cm round cake tin.  Once it was filled to about half full (use half of both the batters, roughly 2 – 3 layers of batter depending on how large your ladle is), I used a butter knife to swirl the batter to create the marble effect.  This was then baked in an oven that was preheated to 180˚C for about 50 – 55 minutes, until a skewer inserted into the cake comes out clean.  Allow the cake to rest for 5 – 10 minutes, then remove from the baking tin and leave to cool on a cooling rack.  It is very important that the cake layers are completely cool before the icing process.  If you are in a hurry (like I was), pop the cake on a plate and into the freezer for 15 minutes or so.  Problem solved.  ^_^  Repeat for the second layer.

While the cake layers were being baked and cooled, I got started on making the sails and drawing the shape of the ship out on paper to use when shaping the layers of the cake.  The technique I used was to draw one half of the ship’s shape, and then fold the paper in half before cutting the shape out so that both sides would be symmetrical.  Using sketch paper, I measured and cut out the sails for the ship.  I looked at some photos of the Black Pearl for inspiration and decided on two masts, with a combination of big and small sails for my little pirate ship.  


To age the paper, I sprayed cooking oil onto the four sides of each sail and put them into the oven at about 230˚C for about 10 – 12 minutes.  Sketch paper is fairly thick, so if you are using paper that is thinner, keep an eye on it as it will burn easily at such high temperatures.  When the paper is browned, remove from the oven to cool.  After that, I used a blade to cut two small crosses on the top and bottom of each sail so that the skewer would not tear the paper too much.  I then traced Pirate Font I found on the internet to write the birthday message on the sail.  To prepare the skewers, I rubbed some of the chocolate frosting that came with the chocolate cake mix onto the bamboo skewers to darken their colour.

For the frosting, I used a Chocolate Swiss Meringue Buttercream recipe my sister recommended.  I found that the amount of dark chocolate suggested in the recipe did not give the frosting enough colour and enough oomph.  I doubled the amount of dark chocolate to achieve the taste I wanted.  It turned out surprisingly well as it was glossy and smooth, but not overly sweet.  Paired with the marble cake, it was just nice.  The outer layer of the icing tends to firm up when refrigerated, but underneath that, it remains soft.  I only wish I had some brown food colouring that day as I would have preferred to have the ship a darker shade of brown.  Once the buttercream was ready, I was ready to glue the pieces of my pirate ship together. 

Tip: To ensure that the meringue has been beaten until it’s stiff, hold the mixing bowl upside down for 10 seconds – if the meringue does not fall, you can move on to the next step. 


Using the pattern I had cut out before, I stacked both the cakes and cut out the shape of my ship.  I then used the extra bits of cake and cut out the shape for the third layer which made up the front, back and sides of the ship.  This created the depression in the deck.  


Using the buttercream, I applied a generous amount between the layers of my ship so that it would look taller.  Be sure to frost the top of the second layer before attaching the third layer!  Once all the pieces were glued together with the buttercream, I started frosting the rest of the cake.  This was the longest part of the whole process.  It is important to make sure that there are no air bubbles in the frosting as that will make the frosting process even harder. 


To create the water, I used the vanilla frosting from the vanilla cake mix and added some blue food colouring.  I then used a spatula and spread this into wavy peaks onto a black plate for contrast.  Next, I added a few more drops of the colouring and smeared it onto the frosting to create some dark blue swirls in the “sea”.  Now that the sea was ready, it was time to transfer the ship onto it.  Smooth out the icing where required.  Using a pizza cutter, I then drew the lines on the ship to emulate wooden boards.  I used chocolate buttons as windows, and chocolate chips as rivets for decorating the ship.  Maltezers were my chocolate of choice as the cannonballs.   


Be careful when sticking the chocolate chips on so as not to accidentally rough up the frosting.  Use tweezers if you have any because I can tell you that trying to pick up chocolate chips using only the edge of a pair of chopsticks really tested my chopstick skills.  The skewers prepared earlier were then used to hold up the sails and then carefully poked into the cake.  As a final touch, the pirate candles were added, together with the rest of the regular stick candles, which I stuck at an outward angle so that they looked like cannons/tubes of fireworks (also so they wouldn’t burn the sails!).